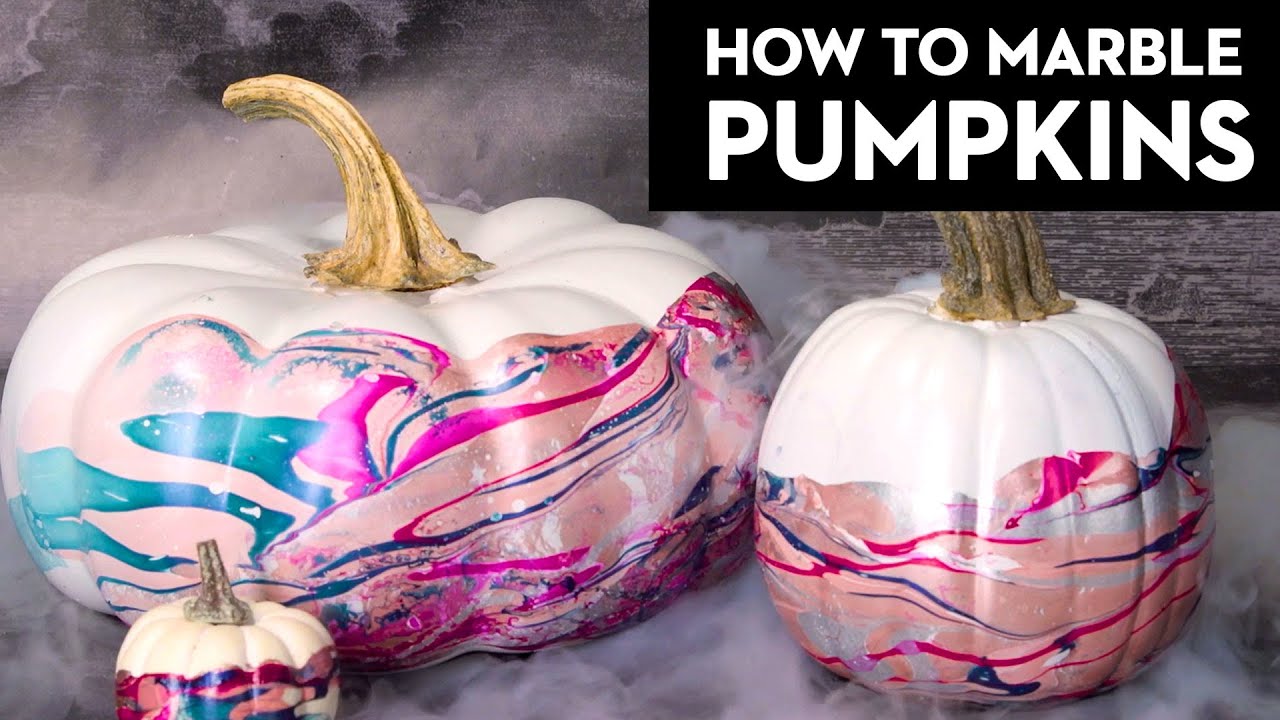
Follow our step-by-step tutorial for making your own beautifully marbled or hyrdro dipped pumpkins this year. We’re sure these pumpkins will be part of your fall decor for years to come.
How To Marble A Pumpkin With Nail Polish
**STEPS**
00:43 Fill your container with warm water about 2/3 full.
00:50 Uncap your nail polish bottles
00:55 Slowly start to pour your nail polish onto the surface of the water. The polish should spread along the surface
01:00 Stay close to the water to make sure the polish floats and doesn’t sink below the surface.
01:09 Create a pattern alternating with different polish colors.
01:14 Taking a toothpick or skewer swirl the paint into your desired marbled pattern.
01:20 Immediately submerge your pumpkin slowly into the water targeting the area of the pumpkin you want to marble with paint.
01:30 If polish sticks to an area where you don’t want it, simply take a cotton swab soaked with nail polish remover to remove.
01:44 For larger pumpkins plan to cover them only partially with the marble effect and smaller pumpkins can be completely covered.
02:00 Keep adding paint to the water’s surface in between dips.
02:07 Set your pumpkin aside to completely dry.
**SUPPLIES**
Large plastic bin that can hold water
Pumpkins- real or fake work for this.
Nail polish colors of your choice.
Toothpicks or skewers
Nail Polish Remover
Cotton swabs
source
Thanks for these verry nice video!
What is the craft store equivalent of nail polish?
Wow these are lovely!!! Fab idea! x
can you imagine the stink?! so bad for the environment.