Tatyana Aksenova / 500pxGetty Images
Hair removal may have satisfying results, but can be painful. Razors come with the risk of nicking skin and creating razor bumps; waxing strips make some flinch; while IPL hair removal devices quite literally zap away hair. If your skin keeps speaking up through redness and irritation, it may be time to graduate to body hair removal’s more sensitive skin-friendly method: Sugaring.
Sugaring is a gentler alternative to traditional waxing, and it’s easy to make at home. Our Good Housekeeping Institute regularly tests hair removal products of all kinds, and armed with this categorical knowledge, we rounded up everything you need to know on how to make sugar wax (and DIYing it at home!).
What is sugaring?
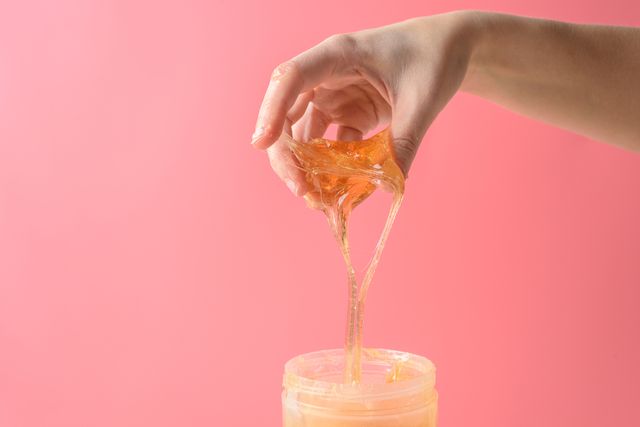
Sugaring, an all-natural method of hair removal, commonly uses a mixture of sugar, lemon and water that forms a hair removal paste. Sugar wax is applied against hair growth to remove hair. Hair removal enthusiasts tend to reserve it for the bikini area, face, underarms, legs and arms, but it can be used for other parts of the body as well. Sensitive skin types tend to go for sugar waxing as it’s less irritating and painful than waxing, according to Michele Green, M.D., a board-certified dermatologist in New York.
Is waxing or sugaring better?
Both make effective ways of removing unwanted body and facial hair, but there are a few differences to keep in mind:
- Sugaring uses fewer potentially irritating ingredients. “Based on the ingredients alone, sugaring is a better option since additives have a higher chance of causing skin irritation,” says Dr. Green. Waxing uses beeswax, resin, oils and other additives that might irritate sensitive skin.
- Sugaring has a lower risk of breaking hair follicles on removal. Sugaring is applied against the hair growth and removed with the hair growth while waxing applies wax in the direction of hair growth and then removed against hair growth. As a result, waxing may cause hair follicles to break in half, which may cause ingrown hairs and additional irritation, according to Dr. Green.
- In-salon sugaring is pricier than waxing. In terms of affordability, waxing tends to be slightly more inexpensive when compared to sugaring.
- Sugaring might take longer. Waxing can be a faster process than sugaring when used for larger surface areas like the legs or back.
Is homemade sugar wax safe?
When properly educated on how to safely sugar wax at home, it can be a good option, plus cheaper and more comfortable, says Dr. Green. That said, DIY sugar wax removal can come with some risks. You can accidentally rip your skin off instead of hair, which can cause pain, inflammation and an increased risk of infection — sugar waxing at home is often less sanitary than sugar waxing done at a salon. That’s why it’s best to start on clean skin, use clean tools, let the hair grow out slightly so the wax has something to grip onto and follow all the proper skin prep steps, below.
“Sugar mixtures that are too hot when applied can burn, and technique matters when pulling off the strips,” Dr. Amin says. “It does take experience to get the right consistency, so maybe skip the mess and leave it to the pros.” If you decide to take it into your own hands, he recommends letting the mixture cool to room temperature and soften to a sticky, honey-like texture. If it’s too hard, add a little water.
Lastly, you should avoid both traditional waxing and sugar waxing if you are undergoing treatment with oral isotretinoin, treated the area with laser hair removal or if you have any skin conditions. Sugaring should only be done on intact skin.
What’s the best sugar wax recipe?
You’ll need a simple trio of sugar wax ingredients that’s probably already in your kitchen: Sugar, water and lemon. The recipe follows a 2:1 sugar to liquid ratio, according to Snehal Amin, M.D. a board-certified dermatologist and the co-founder and surgical director of MDCS Dermatology:
Sugar wax ingredients
How to make sugar wax on a stovetop
Ingredients
- 1 cup of sugar
- 1/4 cup of lemon juice
- 1/4 cup of water
Directions
- Melt the mixture in a saucepan, then bring to a boil for about 10 minutes while stirring continuously.
- Remove from heat once it turns a caramel color.
- Pour into a heat-proof jar and let cool for 5-10 minutes. Do not apply until the mixture has gelled together and has “a consistency a little thicker than honey,” Dr. Amin says.
How to make sugar wax in a microwave
Ingredients
- 1 cup sugar
- 2 teaspoons lemon juice
- 2 tablespoons water
- 1 tablespoon salt
Directions
- Combine ingredients in a microwaveable glass bowl.
- Microwave in 1-minute intervals, checking on it after each minute. (It may take 5-6 minutes, which varies depending on your microwave’s power.)
- Let the mixture cool and turn a maple syrup color with a sticky, spreadable, stretchy consistency.
How to use sugar wax with traditional wax strips
This content is imported from YouTube. You may be able to find the same content in another format, or you may be able to find more information, at their web site.
The idea of waxing yourself may make you wince, but here’s the most seamless step-by-step guide for removing hair with either traditional wax strips or just sugar wax itself:
- Scoop out a thick layer of the sugar wax paste using a clean wax stick.
- Apply the mixture directly to skin against the direction of hair growth.
- Cover the wax completely using clean cotton cloth strips.
- Pull skin taut and swiftly peel back with the grain of your hair.
- Repeat using clean cloth strips for each section until hair is removed completely.
How to use sugar wax without strips
- Grab the cooled wax using clean fingertips and apply it directly onto the skin opposite the direction of hair growth.
- Pull skin taut with the free hand.
- Remove with quick, short pulls in the same direction as the hair growth.
How to prep skin for sugaring
“Be mindful that proper hygiene prep and clean tools are necessary to avoid potential infection, Dr. Amin says. Here’s what to keep in mind:
- Exfoliate skin a few days before the treatment — this strips away any dead skin cells while reducing the risk of ingrown hairs.
- Let hair grow out a little or skip shaving for at least a week prior so that your hair is at adequate length for the sugar waxing.
- Put a pause on tanning, retinols or other similar products in the treatment area one week prior. “These topicals can sensitize the skin and increase the risk of developing hyperpigmentation (dark spots) after waxing,” Dr. Amin says.
How to care for your skin post-sugaring
Post-sugar wax, avoid exfoliating, friction and minimize touching the area for 48 hours. Tip: Loose, comfortable clothing prevents friction in the area. Skip moisturizers and product application and minimize sweating for 24 hours to avoid clogged pores. “Bacteria thrive in moist, warm environments and sugar is food,” Dr. Amin says. “Folliculitis, little bumps on the skin, can sometimes occur after waxing from irritation to the hair follicle or because of infection.”

Tatyana Aksenova / 500pxGetty Images
Meet the experts
- Michele Green, M.D., is a board-certified dermatologist who attended Mount Sinai Medical School in NYC. She specializes in a variety of cosmetic dermatology treatments.
- Snehal Amin, M.D. is a board-certified dermatologist and the co-founder and surgical director of MDCS Dermatology.
- Chiara Butler is a reviews analyst in the Good Housekeeping Institute’s Beauty Lab.
This content is created and maintained by a third party, and imported onto this page to help users provide their email addresses. You may be able to find more information about this and similar content at piano.io